

I was sitting in a dimly lit corner of my favorite cafe, trying to finish a client proposal, when my high-end ultrabook just went dark. No warning. No “plug in your charger” notification. Just a black screen and a sinking feeling in my gut. I knew exactly what it was. My sleek, expensive machine had become a paperweight because the battery had finally given up the ghost. For years, manufacturers have told us these thin machines aren’t user-serviceable. They want you to believe that once that lithium-ion heart stops beating, it is time to head to the store and drop another fifteen hundred bucks. But I am here to tell you they are wrong. If you are struggling with a machine that won’t hold a charge, you do not have to give up on it just yet.
Stop Letting Manufacturers Treat Your Laptop as Disposable
Modern ultrabooks are marvels of engineering, but they are also designed with a “planned obsolescence” mindset that drives me crazy. When I first started poking around the internals of these “unrepairable” systems, I nearly set my workbench on fire. I made the classic rookie move of thinking I could just wedge a metal flathead screwdriver under the adhesive to pry the cells loose. Bad move. I punctured the casing, saw a spark, and learned very quickly that lithium and sharp metal are a volatile combination. You should check out these computer repair for beginners tips to avoid costly mistakes like I did. The truth is that while the battery might be soldered or heavily glued to the chassis, it is still a component that can be swapped with the right amount of heat and some specialized solvents. We are fighting a tide of e-waste here; according to research from iFixit, the trend toward glued-in components is a leading driver of the 53 million metric tons of electronic waste produced annually. I refuse to let a perfectly good CPU and a beautiful 4K screen go to the landfill just because of a failing power cell.
Is this repair actually worth the risk of a bricked motherboard?
I get this question a lot from my neighbors when they see me with a heat gun pointed at a motherboard. It is a valid fear. If you have noticed that your laptop battery is swelling under the trackpad, the risk of doing nothing is actually higher than the risk of the repair. A swollen battery can crack your case or even catch fire. Replacing a soldered-in or glued-in battery requires a steady hand, but it is entirely doable for anyone who can follow a sequence of steps without rushing. Once you get the new part in, you might even need to know the secret to getting a laptop to recognize a new battery so the BIOS doesn’t throw a tantrum. Have you ever been told by a big-box store technician that your laptop was “unfixable” simply because the battery wasn’t a clip-in model? I want to hear about your experiences in the comments because it is time we stop falling for that narrative. Today, I am going to walk you through how to safely navigate the delicate internals of your modern ultrabook and reclaim your mobility.
Gather Your Arsenal Before Opening the Chassis
Before you even think about unscrewing that bottom panel, you need the right kit. This isn’t a standard ‘screwdriver and a prayer’ job. You will need a set of precision Torx or Pentalobe bits, plastic spudgers, high-concentration isopropyl alcohol (90% or higher), and a specialized heat pad or a controlled heat gun. I learned the hard way that brute force is a recipe for disaster. I once tried to rush a repair on a client’s MacBook Air using a standard hair dryer because my heat gun was in the shop. I ended up melting the plastic bezel near the hinge before the adhesive even softened. I had to buy the customer a whole new top case. Precision tools aren’t a luxury; they are the difference between a repair and a replacement. While you are inside, you might also want to know how to safely upgrade your ram without voiding the warranty to maximize the machine’s lifespan.
Apply Heat Like a Surgeon Not a Flamethrower
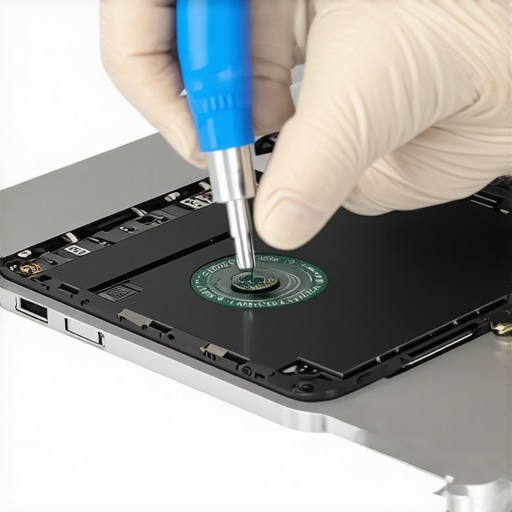
The goal is to soften the adhesive holding the battery to the palm rest without cooking the logic board or the trackpad. If you have ever followed a laptop screen replacement step-by-step repair guide, you know that heat is a double-edged sword. Use a heat gun on its lowest setting, keeping it at least six inches away from the chassis, and move it constantly in a circular motion. You want the underside of the laptop to be warm to the touch, not painful. This expansion allows the glue to lose its grip. If you overdo it, you risk damaging the delicate layers of the display or warping the plastic components. For business owners, this level of delicate hardware work is exactly why managed IT is a game-changer for growing companies; you don’t want your lead developer playing with fire when they should be coding.
Isopropyl Alcohol is Your Best Friend
Once the case is warm, the real secret is chemical, not physical. Take a plastic syringe or an eye dropper and apply a few drops of high-purity isopropyl alcohol along the edges of the battery cells. The alcohol acts as a lubricant and a solvent, breaking the chemical bonds of the adhesive. Slide a thin plastic card—an old credit card or a guitar pick works perfectly—under the battery. If you feel resistance, stop. Add more alcohol and wait sixty seconds. Never use metal tools here. A single slip could puncture the cell, leading to a thermal runaway event that the power of data recovery tools cannot fix if the resulting fire melts your SSD. I have seen entire offices lose weeks of work because a DIY repair went south, which is why your business needs a disaster recovery plan before you need it.
Make Sure the BIOS Actually Accepts the New Heart
After the old battery is out and you have cleaned the remaining residue, the battle is only half won. Modern firmware is notoriously picky about power sources. Before you glue the new one down, plug it in and boot the machine. You need to verify that the system doesn’t throttle the CPU or give you a ‘non-genuine’ warning. Understanding the truth about using third-party batteries in professional laptops is crucial here; some ‘bargain’ cells lack the necessary communication chips to talk to your motherboard correctly. If the laptop boots and shows a charging status, you are in the clear. If not, you might need to perform a CMOS reset or a power flea drain to force the motherboard to acknowledge the new hardware signature.
One of the biggest lies in the tech world is that software can fix a hardware problem. I see it every week: someone has a laptop that keeps freezing, so they spend six hours reinstalling Windows, only to have it crash again because the SSD is dying. If you are constantly wondering why your computer keeps freezing when you watch youtube videos, stop reaching for the ‘Reset’ button immediately. You are likely dealing with thermal throttling or a failing storage controller. Reinstalling the OS in this state is like repainting a car with a blown engine—it looks better for a second, but it is not going anywhere. This is why troubleshooting common computer repair issues effectively requires a ‘hardware-first’ mindset before you touch a single line of code.
Software Won’t Save a Dying Motherboard
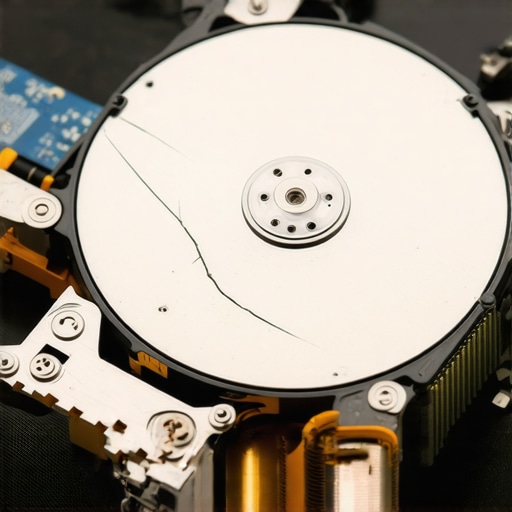
The most dangerous mistake I see involves data recovery. When a drive starts making a rhythmic ticking or a faint scraping sound, the average user downloads ‘recovery’ software and runs a deep scan. This is a death sentence for your files. That software forces the drive heads to sweep across the platters thousands of times, grinding away the very magnetic film that holds your data. According to data recovery specialists at Gillware, attempting software recovery on a mechanically failing drive can turn a $300 professional recovery into a $3,000 ‘cleanroom’ nightmare because of physical platter damage. If you hear that noise, you need to know how to get files off a hard drive that makes a scraping sound safely, which usually involves an immediate power-down. Running data recovery secrets expert techniques to save your files fast means knowing when to stop touching the hardware entirely.
Is Your Recovery Attempt Making the Corruption Permanent?
Many DIYers believe that as long as the computer stays on, they have a chance. But in the world of high-density storage, the ‘oops factor’ is magnified by every second of power. If you are trying to recover a word document after your pc crashed, and the crash was caused by a power surge, every subsequent boot attempt risks overwriting the sectors where that temp file resides. Even with screen repairs, the nuance is often ignored. People replace a cracked panel and then complain that the colors look ‘off.’ Most don’t realize that a high-end display requires color profile calibration within the OS after a hardware swap. If you have ever wondered why your laptop screen resolution looks blurry on a high end display after a repair, it is often a mismatch between the new panel’s firmware and the old driver settings. Have you ever fallen into the trap of trying to ‘software fix’ a hardware disaster? Let me know in the comments because I have seen it ruin more careers than any virus ever could.
The Management Trap vs Proactive Auditing
For businesses, the nuance lies in the difference between ‘support’ and ‘management.’ Most people think they are paying for someone to fix the printer or reset a password. In reality, effective managed IT solutions for growing companies are about preventing the fire before it starts. If your provider is not discussing why your managed IT provider should be doing quarterly audits, they are not managing your IT; they are just waiting for you to break so they can bill you for the repair. This proactive shift is the hidden secret to scaling without tech-induced heart attacks. When you invest in managed IT solutions streamlining operations for small businesses, you are not just buying ‘repair’—you are buying the assurance that you will not need a repair in the first place.
The real difference between a ‘one-off’ fix and a machine that lasts seven years lies in the toolkit you keep in your desk drawer. I never start a job without my iFixit Pro Tech Toolkit and a bottle of 99% isopropyl alcohol. Most people use cheap, generic bits that strip screws, turning a five-minute battery swap into a nightmare of extraction. Beyond the physical tools, you need diagnostic power. I rely on HWiNFO for real-time thermal monitoring because it catches the sensor spikes that Windows Task Manager ignores. This proactive data gathering is exactly why I recommend managed IT strategies to keep your business secure in 2025; it is about knowing a fan is failing before the CPU melts down. While having the power of data recovery tools is a safety net, the goal is to never need them.
Stop the Dust Before it Stops Your CPU
Every six months, I perform what I call a ‘thermal audit.’ Dust is a silent killer that insulates your components like a thick wool sweater. I have seen laptops lose 30% of their performance just because the exhaust fins were choked with pet hair. You need to know how to clean a laptop fan without pushing dust deeper inside to prevent creating a compact ‘felt’ plug that blocks all airflow. This physical maintenance is the hardware equivalent of why your IT budget is leaking money on unused software; neglecting the small, invisible details leads to massive inefficiency over time.

How do I maintain my hardware performance over the long haul?
Maintenance isn’t a one-time event; it is a rhythm. First, always use the move that keeps your laptop from overheating on your lap by ensuring the intake vents are always clear. Second, consider a repaste every two years. According to the thermal application guides from Arctic Silver, even the best thermal compound can lose effectiveness if the mounting pressure of the heatsink isn’t perfectly uniform, potentially leading to microscopic air gaps that spike temperatures. For my business clients, I push for managed IT solutions streamlining operations for small businesses because they automate the background checks that humans often forget.
The Modular Future is Finally Arriving
I predict we are heading toward a ‘modular-first’ era. Companies like Framework are proving that you can have a thin, light laptop that is entirely user-serviceable. Soon, the idea of a ‘disposable’ motherboard will seem like a relic of the early 2000s. We will stop buying entirely new machines and start swapping ‘expansion cards’ or CPU modules as our needs change. I want you to try one thing tonight: download a monitoring tool like HWiNFO and check your ‘CPU Package’ temperature while watching a high-resolution video. If your temperatures are hitting 90°C or higher, it is a clear signal that your internal cooling system is struggling. Don’t wait for the blue screen—take action while the hardware is still healthy.
What My Most Expensive Mistakes Taught Me About Tech
I’ve spent a decade inside the guts of various machines, and if there’s one thing I’ve learned, it’s that patience is your most valuable tool. I used to think I could outsmart a failing drive with a bit of software, but I quickly realized that physical problems require physical solutions. For instance, if you are venturing into the world of computer repair for beginners to avoid costly mistakes, remember that forced entries usually result in broken plastic and tears. Another lightbulb moment came when I stopped trying to ‘guess’ why a screen was flickering and started using diagnostic tools. Most people do not realize that laptop screen repair diy tips for clearer displays are not just about the panel; they are about the health of the ribbon cable and the grounding on the motherboard. Lastly, never underestimate the power of a professional audit. Sometimes, the best repair is knowing when you are out of your depth and need effective managed IT solutions for growing companies to keep your business afloat while you fix your own gear.
The Gear That Never Leaves My Workbench
If you want to move beyond being a hobbyist, you need a kit that matches your ambition. I swear by my precision bit set—nothing stops a repair faster than a stripped Pentalobe screw. I also keep a bottle of 99% isopropyl alcohol nearby at all times; it is the only safe way to dissolve the industrial-grade adhesive modern manufacturers use to trap batteries. For data emergencies, I rely on hardware-level cloning tools because I know data recovery secrets expert techniques to save your files fast often involve getting an image of the drive before the mechanical parts give out completely. Finally, I always have a spare thermal pad and high-quality paste ready; it is the simplest way to prevent the heat-death of a hard-working CPU during the reassembly phase.
Take Control of Your Machine’s Destiny
You do not have to be a victim of the buy-a-new-one cycle. Whether you are dealing with a swollen battery or a cracked panel, the power to fix it is literally in your hands. Taking the first step into troubleshooting common computer repair issues effectively is the most empowering thing a tech owner can do. Your hardware is not a mysterious black box; it is a modular system waiting for you to understand its language. Start small, be meticulous, and do not let a little glue stand in your way of a faster, healthier laptop. Have you ever successfully revived a piece of tech that everyone else told you was dead? Tell me about your biggest repair win in the comments below!