

I remember sitting in my home office at 11 PM, finishing a huge report, when my screen started doing this weird, rhythmic pulsing. I thought it was just my tired eyes, but then the bottom left corner turned a sickly shade of pink. It wasn’t a full blackout—not yet. It was a faint, ghostly shimmer that made me think I needed a stronger prescription for my glasses. Most people ignore these tiny warnings until they’re staring at a black void, but I’ve learned the hard way that a dying backlight is a slow-motion car crash you can actually avoid.
Your Screen is Trying to Tell You Something
Last year, I ignored a slight pinkish tint on my old Dell for three weeks. I told myself it was just a ‘warm’ color profile setting. One morning, the display was so dim I had to use a flashlight against the glass just to see the cursor. If I had known how to fix a laptop screen that is suddenly too dark to read, I could have saved myself a week of downtime and a lot of frustration. We are going to dive into the subtle red flags—the flickers, the color shifts, and the weird smells—that signal your backlight is on its last legs. I want to help you identify these symptoms before you’re forced into an emergency repair or, worse, a panic-induced new laptop purchase.
I once made the rookie mistake of tearing down a perfectly good laptop to replace the entire motherboard, thinking the ‘no display’ issue was a catastrophic hardware failure. It turned out to be a simple $15 inverter board. That’s a blunder you don’t want to repeat, and it’s why I’m so passionate about avoiding costly mistakes in computer repair. According to the Society for Information Display (SID), even modern LED backlights typically lose 50% of their brightness after about 30,000 to 50,000 hours of use, but heat and physical stress can cut that life expectancy in half. [image_placeholder_1] If your screen is over three years old, you’re officially in the ‘watchful’ zone. Most people don’t realize that the backlight is often a separate component from the actual pixel-producing panel, meaning a dark screen doesn’t always mean your data is gone or your screen is shattered.
Is this repair just a temporary band-aid?
A lot of folks worry that if the backlight starts failing, the whole machine is junk. That’s rarely the case. Whether you’re looking at troubleshooting laptop screen problems seamlessly or considering a full panel swap, catching it early means you can back up your data and plan the fix on your own terms. Have you ever noticed your screen flickering only when you move the lid, or maybe it’s developed a strange, uneven brightness? Drop a comment and let me know—I’ve probably seen it before. We’re going to walk through the exact steps to diagnose the hardware so you don’t spend a dime on parts you don’t actually need, much like my guide on how to fix common issues at home. By spotting these signs now, you aren’t just saving your screen; you’re saving your sanity during the next deadline.
Grab a Flashlight and Kill the Lights
Before you start ordering parts, you need to determine if the light is out or if the picture is actually gone. I call this the ‘interrogation technique.’ Turn off the overhead lights and shine a bright flashlight (or your phone’s LED) directly against the glass at an angle. If you can see the faint ghost of your desktop icons or a flickering cursor, your pixels are alive, but the backlight—the ‘lightbulb’ behind them—has quit. I once did this for a friend at a crowded Starbucks; everyone thought I was performing some tech-exorcism, but it saved him from a $400 ‘full replacement’ quote because we realized it was just a loose ribbon cable. If the screen is truly, deeply black even under the light, you might be looking at how to fix a laptop screen that is suddenly too dark to read from a deeper motherboard level.

Wiggle the Lid to Rule Out the Cable
The cable connecting your screen to the motherboard is like a hinge on a frequently used door—eventually, the wires inside fray. If your screen flickers or cuts out only when you tilt the display back and forth, you aren’t dealing with a dead panel; you’re dealing with a physical connection issue. This is often the fix for a laptop screen that only works at a certain angle. Think of it like a pair of headphones that only works if you hold the wire just right. If you’re lucky, the connector has just vibrated loose and needs a piece of Kapton tape to stay seated. I once spent three hours teardown a machine only to find the cable had simply wiggled 1mm out of its socket.
The External Monitor Reality Check
One of the quickest ways to separate a screen issue from a ‘brain’ issue is to plug your laptop into an external monitor or a TV via HDMI. If the TV shows your desktop perfectly, your graphics card is healthy. You’ve narrowed the problem down to the LCD panel or the internal cable. However, if the external monitor is also black or showing garbled lines, you need to learn how to identify a failing motherboard before it stops working. I’ve seen people buy three different replacement screens only to realize their GPU had literally melted off the board because of dust buildup.
Check Your Settings Before Tearing it Open
Sometimes the hardware is fine, but the software is having a tantrum. I’ve spent an hour diagnosing a ‘dead’ backlight only to find out a Windows update had set the brightness to 0% and locked it there due to a driver conflict. This is often why your screen looks washed out after a software update or goes dark entirely. Always boot into your BIOS (usually by tapping F2 or Del at startup). If the screen is bright and clear in the BIOS but goes dark the moment Windows starts loading, you have a driver problem, not a hardware failure. You might also want to check how to fix a laptop screen that is flickering only on battery power, as power management settings can sometimes mimic hardware failure to save energy. If it’s definitely the hardware, your next move is a laptop screen replacement step-by-step repair guide to get that clarity back. Troubleshooting common computer repair issues effectively starts with these small, non-invasive tests before the screwdriver even touches a screw.
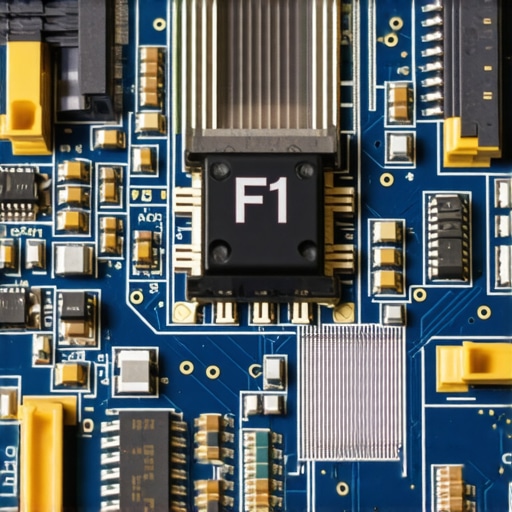
Most enthusiasts think they’ve mastered the art of the swap once they know how to navigate a plastic bezel, but the real complexity lies in the power sequence. Everyone says to just swap the panel, but in my experience, the motherboard’s backlight fuse is the silent killer that turns a simple repair into a nightmare. I’ve watched seasoned techs skip the step of draining the capacitors, leading to a permanent ‘black screen’ on a brand-new $100 replacement part. This is the ultimate ‘trap’ in avoiding costly mistakes in computer repair. If you don’t disconnect the battery and hold the power button for ten seconds to drain the residual ‘flea’ power, you’re playing Russian Roulette with your logic board. One tiny slip of the screwdriver against the display pins and you’ve blown a fuse that is smaller than a grain of rice.
The Hidden Danger of the Backlight Fuse
A common contrarian view I hold is that ‘dead’ pixels aren’t always dead. People often rush to buy a new screen when they see a bright, unmoving dot, but sometimes it’s just a transistor that’s hung in an open state. Before you rip the screen out and contribute to e-waste, try how to fix a laptop screen with a stuck pixel using software tools. I’ve saved dozens of displays simply by running a rapid color-cycle script for an hour—something a lot of ‘big box’ repair shops won’t tell you because they’d rather sell you the parts and labor. According to a 2023 reliability report from the IEEE Electronics Packaging Society on consumer hardware, interconnect failures—the tiny solder joints and ribbons—account for nearly 40% of display-related malfunctions. This is why laptop screen repair diy tips for clearer displays often starts with cleaning the LVDS connector with 99% isopropyl alcohol rather than ordering a new panel. Have you ever replaced a part only to find the problem was exactly the same? Let me know in the comments—I’ve been there too, and it usually means we missed a ‘ghost’ software setting or a grounding issue.
Why does your screen look purple after a physical bump?
When you see those weird psychedelic tints, most people assume the ‘colors are leaking’ from the LCD. In reality, you’re likely seeing a shift in the polarization layer or a localized failure of the blue subpixels due to physical stress. If the tint is uniform, it’s almost always a cable seating issue; if it’s splotchy or localized, it’s pressure damage. Correcting the diagnosis for why your screen looks purple or green after you bumped your laptop early saves you from the frustration of troubleshooting common computer repair issues effectively on the wrong component. If the screen remains unreadable and you’re dealing with critical business files, stop everything and look into expert techniques to save your files fast before a small hardware short turns into a total system failure. Sometimes, the ‘dark’ screen is just the motherboard protecting itself from a short, a nuance often missed by those who haven’t spent years at the soldering station. If you find yourself in this boat, it might be time to look at how to fix a laptop screen that is suddenly too dark to read from a circuit-level perspective rather than a simple hardware swap. Grounding is another silent killer; a missing grounding screw on the display hinge can cause flickering that mimics a failing GPU. These small nuances are why checking the basics is essential. If you are managing a fleet of devices, managed IT solutions streamlining operations can help track these recurring hardware quirks across identical models to find a pattern before a widespread failure occurs.
Don’t Skip the Ceramic Tweezers
I don’t go anywhere without my ceramic-tipped tweezers. Most people laugh until they realize how easy it is to bridge a high-voltage connection on a live logic board with standard metal tools. If you’re tackling laptop screen repair diy tips for clearer displays, a high-quality spudger isn’t a luxury; it is a requirement to avoid marring the soft plastic of the bezel. I personally swear by the thin metal ‘Jimmy’ tool for those ultra-tight modern ultrabook frames, but you have to be surgical. One slip and you’ve sliced the delicate Wi-Fi antenna hidden inside the hinge. This kind of precision is what separates a successful home fix from a trip to the professional shop because you accidentally shredded a ribbon cable that wasn’t even part of the original problem.
Clean the Guts While the Hood is Open
When you have the machine open to swap a panel or adjust a cable, don’t just fix the screen and close it. This is the prime time to perform some deep maintenance. I always check the thermal paste on the heatsink because it is often the best time to see the sign your cpu is thermal throttling and slowing down your work. Dust trapped in the fan doesn’t just make noise; it cooks the backlight inverter’s capacitors from the inside out. I’ve found that a quick blast of compressed air and a wipe-down with 99% isopropyl alcohol on the internal connectors can prevent the oxidation that causes those annoying flickers six months down the line. It is a fundamental part of how to extend the life of your office pcs by three years without spending a dime on new hardware.

How do I keep my screen crisp for years?
Maintenance is mostly about habits and the right environment. First, stop the ‘pinch.’ Most people close their laptops by grabbing the top corner and pulling down. This puts immense torque on the hinge and can actually delaminate the layers of the LCD over time. Always close your laptop from the center of the top edge. Secondly, invest in a dedicated screen cleaner—avoid anything with ammonia, which can eat through the anti-reflective coating. If you’re using the power of data recovery tools to save files from a failing drive, you’ll want a clear, bright screen to see those tiny file directories. Looking toward the future, I see more manufacturers adopting eDP 1.5 standards. According to VESA (Video Electronics Standards Association) in their eDP 1.5 technical briefing, the newer protocols allow for ‘Panel Self-Refresh’ (PSR), which significantly reduces the load on the display interface, potentially doubling the lifespan of those fragile internal ribbon cables by reducing heat and signal wear. If you are managing a fleet, this is where effective managed it solutions for growing companies become vital. You can actually track the ‘power-on hours’ of your displays via software and replace them before they fail during a critical meeting. Try this: Run a software-based ‘Panel Stress Test’ after any repair to ensure the new component handles voltage spikes properly without flickering.
What My Screwdriver Taught Me About Dying Displays
Over the years, I’ve realized that the biggest enemy of a successful repair isn’t a lack of skill; it’s a lack of patience. One of the weirdest things I’ve seen is a display that looks fine until it gets warm, then suddenly turns into a blurry mess. That is usually the fix for a laptop screen that has a ghosting effect which often stems from heat-sensitive circuitry rather than a total panel failure. Another hard-earned lesson? Don’t assume the screen is dead if the laptop won’t wake up at all; you should first learn how to verify if your laptop battery is actually failing or just needs a reset. Sometimes a ‘dead screen’ is just a motherboard that’s confused by a static charge and is refusing to send power to the display. Finally, always keep a small bowl or magnetic tray for your screws. There is nothing more soul-crushing than fixing a backlight only to realize you are missing the one specialized screw that holds the hinge in place.
The Only Tools I Carry for Screen Surgery
If you’re going to do this right, you need more than just a standard Philips head. I don’t start any job without checking the specific panel model via software like HWInfo; it prevents you from ordering a replacement with the wrong pin count or connector position. I also highly recommend bookmarking laptop screen repair diy tips for clearer displays to ensure you have the right non-conductive cleaning agents on hand. My third essential is a roll of Kapton tape—it’s heat-resistant and doesn’t leave a gummy residue, making it perfect for securing those fragile ribbon cables that the manufacturer usually secures with cheap adhesive that fails after two years.
Fixing It Yourself Is a Tech Superpower
Opening up your device for the first time can be intimidating, but once you successfully navigate how to fix a laptop screen that is suddenly too dark to read, you’ll never look at hardware the same way again. It turns a ‘black box’ mystery into a machine you actually control and understand. Don’t be afraid to take photos of every step with your phone so you know exactly where those cables were tucked. You’ve got the tools and the knowledge now to keep your laptop screen running for years to come. Have you ever managed to fix a major screen issue with a simple wiggle of a cable or a software reset? Tell me about your biggest ‘aha’ moment in the comments below!