

I’ll never forget the night I almost threw my favorite laptop out the window. It was 2 AM, the house was silent, and I was trying to finish a high-stakes project without waking my wife. I lowered the brightness to about 10% to save my eyes, and suddenly, the screen started vibrating like a cheap neon sign in a dive bar. My eyes started throbbing within minutes. At first, I thought I was just exhausted, but no—this was a real, physical hardware glitch. I sat there for an hour, cranking the brightness up and down, watching the display stabilize at 100% and then fall apart at 20%. It felt like a betrayal from a machine I used every single day. I remember sitting there, clutching my cold coffee, watching my desktop icons dance. It wasn’t just annoying; it was unusable. I tried tilting the screen, thinking it might be the fix for a laptop screen that only works at a certain angle, but the angle didn’t matter. Only the brightness slider did. That’s when I realized this wasn’t a loose connection, but something far more interesting—and luckily, more fixable.
That Maddening Shimmer When the Lights Go Down
[image_placeholder_1] After years of working in troubleshooting common computer repair issues effectively, I’ve seen this exact scenario play out dozens of times. You want to save some battery or protect your retinas, but the moment you drop that slider, the display goes haywire. It’s a specific kind of torture. The good news is that your laptop likely isn’t headed for the scrap heap just yet. I’m going to show you exactly how to pin down whether this is a simple driver hiccup or something deeper. We are going to look at everything from software conflicts to the physical cables hidden behind your hinge. Early in my career, I actually made the mistake of telling a client they needed a full laptop screen replacement for this very issue, only to find out it was a power-saving setting in the Intel graphics control panel. Talk about an embarrassing (and expensive) lesson in computer repair for beginners! We’re going to avoid those costly blunders today.
Is this flickering actually going to break my computer?
It’s the question everyone asks when they see their screen acting like a strobe light. You’re probably worried that you need to identify a dying backlight before the whole thing goes black. While it’s possible, most of the time it’s related to how your screen handles Pulse Width Modulation (PWM). Essentially, many screens don’t actually ‘dim’; they just turn on and off really fast to trick your eyes. According to research cited by the IEEE Power Electronics Society, low-frequency PWM is a leading cause of both visible flicker and eye strain in LED displays. If the frequency is set too low by your hardware drivers or the power management system, you get that ‘shimmer’ effect. Before you start panicking and looking for laptop screen repair DIY tips, we need to check the simple stuff first. It’s rarely a ‘broken’ screen in the traditional sense, but more of a ‘confused’ one. Have you noticed this happening more when you are on battery power versus being plugged in? Let me know in the comments if yours only acts up when you’re unplugged, because that’s a huge clue that your laptop is trying to be ‘too helpful’ with energy savings. If you’ve been troubleshooting laptop screen problems seamlessly on your own, you might have already tried a reboot, but we’re going deeper than that into the actual power management of your GPU. Let’s roll up our sleeves and get that display steady again, because no one should have to work with a headache-inducing strobe light.
Ditch the Windows Update Auto-Pilot
We often think the ‘Update’ button in your settings is the ultimate solution. It is not. I once spent an entire Saturday trying to fix a client’s high-end ultrabook because they thought their hardware was failing. While they were worried about the power of data recovery tools thinking the whole system was crashing, I realized their flickering was just a generic Microsoft Basic Display Driver fighting with the actual Intel silicon. To fix this, you must go directly to the manufacturer’s site—Intel, NVIDIA, or AMD. Download the specific driver package for your model. This ensures the hardware ‘speaks’ the correct language to the screen controller, preventing the mismatch that causes that rapid-fire shimmer.
Kill the Stealthy Power Saving Modes
This is the most common culprit. If you have been wondering how to fix a laptop screen that is flickering only on battery power, the villain is likely a feature called ‘Display Power Saving Technology.’ It is designed to save juice by dynamically adjusting brightness based on the image on screen, but it often manifests as a nauseating flicker. Open your Graphics Command Center—usually found by right-clicking the desktop—and navigate to the Power tab. Turn everything related to ‘Adaptive Brightness’ or ‘Enhanced Power Saving’ to OFF. It’s like telling a car to stop hunting for gears every five seconds; the performance just becomes consistent.
Check Your Hardware Pulse Without Tearing It Apart
Before you look into laptop screen repair how to fix common issues at home, perform a simple physical stress test. Open your laptop lid slowly and stop at various angles. If the flicker intensity changes as you move the hinge, you aren’t dealing with a software bug; you have a pinched or failing eDP (embedded DisplayPort) cable. Think of this cable like a garden hose; if it is kinked, the data ‘flow’ is interrupted. If the flicker stays identical regardless of the screen’s angle, the problem is almost certainly electronic, not physical.
Wrangle the PWM Frequency Directly
Sometimes the hardware is healthy, but the factory settings are just too conservative. There are specialized third-party utilities that can force the Pulse Width Modulation (PWM) frequency higher. I used this trick on an old workstation that was giving the office staff chronic migraines. By boosting the frequency from 200Hz to 2000Hz, the flicker became invisible to the human eye. It’s a slightly more advanced move, similar in technical weight to how to upgrade the ssd in a laptop that has a soldered primary drive, but it can save a display that otherwise feels like a strobe light. Finally, always how to verify if your laptop battery is actually failing, because inconsistent voltage from an aging cell can also cause the backlight to struggle at low power states.
It’s a common misconception that once you’ve tweaked the software or adjusted the power settings, the danger is over. However, the contrarian truth I’ve learned from decades in the shop is that ignoring a flickering or cracked screen is a high-stakes gamble with your entire system’s life. Most people treat a small crack like a minor ding on a car bumper—annoying, but ultimately harmless. In reality, as I’ve explored when discussing why a cracked laptop screen can eventually damage your motherboard, a compromised LCD panel can lead to an electrical short. This short travels directly back through the display cable to the logic board, potentially frying sensitive components. I have seen countless high-end ultrabooks turned into expensive paperweights because the owner thought they were being thrifty by delaying a repair. It is a classic example of why computer repair for beginners should always start with a proper hardware assessment rather than just software patches.
Stop treating your cracked screen like a cosmetic flaw
Ignoring the physical integrity of your display is the fastest way to escalate a cheap fix into a total loss. When the glass or the underlying substrate is breached, the tension across the panel becomes uneven. This doesn’t just distort the image; it puts physical strain on the ribbon cables. If you’ve been searching for laptop screen repair DIY tips, remember that a screen is part of a complex circuit, not just a window. A small hairline fracture can expand with thermal changes, eventually snapping the microscopic traces that carry power. It’s a nuance that many people miss until the screen goes completely dark.
Why does the display only shimmer during high-performance tasks?
This is a sophisticated symptom that often baffles even experienced technicians. If your screen acts up specifically when the processor spikes or you’re rendering video, you aren’t necessarily looking at a failing panel. Instead, you’re likely dealing with electromagnetic interference (EMI) or inadequate shielding within the chassis. In modern thin-and-light laptops, components are packed so tightly that signal cross-talk is a constant threat. According to technical standards published by the Video Electronics Standards Association (VESA), improper grounding of the high-speed data lanes (eDP) can lead to bit errors that manifest as rhythmic flickering. It’s less about a ‘broken’ part and more about a loss of signal integrity due to internal heat or aging thermal pads. This nuance is why I always suggest looking at laptop screen repair how to fix common issues at home with a critical eye; you might be treating the symptom rather than the electromagnetic cause. 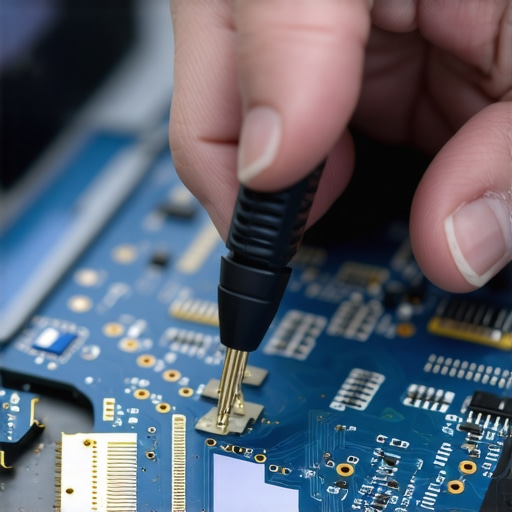
Avoid the DIY recovery trap that kills hard drives for good
The biggest ‘oops’ factor I see involves botched DIY data recovery attempts. When a screen goes dark or a system flickers and then fails to boot, many users panic and try to ‘force’ a recovery using generic software. This is a fatal mistake for your data. In my guide on the danger of using free file recovery tools on a failing mechanical drive, I highlight how these tools often stress the read/write heads to the point of physical collapse. They essentially ‘torture’ a dying drive until it gives up the ghost entirely. For professional environments, this is exactly why effective managed IT solutions for growing companies are non-negotiable. It’s not just about ‘fixing’ a screen; it’s about having managed IT strategies to keep your business secure in 2025 so that a hardware glitch doesn’t turn into a permanent loss of company intelligence. A managed service provider will prioritize data integrity before even touching the screen hardware.
We need to stop listening to the ‘just reboot it’ crowd. True computer repair is an exercise in forensics—analyzing voltage, signal noise, and component lifespan. Sometimes the ‘simple’ fix is just masking a deeper hardware failure. Have you ever fallen into this trap of thinking a hardware issue was ‘just a software glitch’ only to have it blow up later? Let me know in the comments.
To stay ahead of these failures, I rely on a specific ritual and a very short list of tools that have never let me down. I’ve spent years refining my ‘desert-island’ toolkit because when a screen starts ghosting or a hard drive begins that ominous clicking, you don’t want to be hunting for a screwdriver set. My go-to for identifying phantom electrical issues is the Fluke 115 Multimeter. It’s expensive, yes, but it provides the precision needed to determine if your flickering is caused by a motherboard voltage drop or just a bad cable. Most computer repair for beginners guides skip the electrical testing, but that is where the real answers live. If you aren’t ready to probe a live board, I highly recommend keeping a copy of Hiren’s BootCD PE on a thumb drive. It’s a Swiss Army knife that helps you run low-level diagnostics without even booting into your potentially corrupted Windows environment.
My desert island toolkit for hardware survival
When the issues are purely visual, I turn to specialized software first. I’ve saved dozens of panels by knowing how to fix a laptop screen with a stuck pixel using software tools before declaring the hardware dead. It’s about being surgical rather than reactionary. For the physical side, I never touch a laptop without a non-conductive nylon spudger. Using a metal flathead to pry open a case is the fastest way to short out a backlight fuse, turning a simple fix into a nightmare. If you’re worried about power delivery, knowing how to tell if your computer power supply is failing or just dusty can save you from replacing a perfectly good laptop when only a $60 brick is at fault.
How do I maintain my laptop display over the long haul?
Maintenance isn’t just about cleaning the dust off—though that helps. It’s about hinge management and thermal control. Every time you rip your laptop open from one corner, you’re twisting the LCD substrate. Always open it from the center. Beyond physics, you should be checking your hardware’s health stats every quarter. For businesses, this is why I advocate for effective managed IT solutions for growing companies. You need an automated system that monitors temperature spikes and drive health so you aren’t surprised by a black screen on a Monday morning. These systems rely on the power of data recovery tools that operate in the background, sniffing out sectors that are going bad before they take your files with them.
The future looks brighter but harder to fix
Looking ahead, I see a massive shift toward OLED dominance in laptops, which brings a whole new set of ‘burn-in’ challenges we didn’t have with traditional LEDs. The trend is moving toward integrated components that are nearly impossible for the average user to swap. According to the 2024 Backblaze Drive Stats Report, even as technology improves, hardware failure rates remain a statistical certainty over a five-year window. We are entering an era where software-defined hardware management will be the only way to extend a machine’s life. This makes following laptop screen repair DIY tips more about prevention and calibration than actually replacing physical parts.
One pro tip to try before you sleep tonight
If you want to feel like a real pro, I want you to try this: Download a tool called CrystalDiskInfo. It’s free and lightweight. Use it to how to check if your hard drive is about to fail using s-m-a-r-t-data. If your ‘Health Status’ shows anything other than a solid blue ‘Good,’ stop what you are doing and back up your files immediately. This simple five-minute check has saved more data in my shop than all the expensive clean-room recoveries combined. Don’t wait for the flicker or the freeze to tell you there’s a problem—let the hardware tell you itself.
Why That Tiny Flicker Is Actually a Warning Shot
In my two decades at the workbench, I’ve realized that a screen flickering at low brightness is rarely just a cosmetic annoyance; it is a diagnostic signal. One of the biggest mistakes I see is users assuming their hardware is invincible as long as it still boots. I learned the hard way that ignoring a jittery backlight is often the first step toward a complete system blackout. If you are seeing these signs, it is time to stop playing the guessing game and start being proactive about your computer repair for beginners habits. Here are a few lightbulb moments I’ve had while fixing these machines:
- Software often masks physical fatigue. If a driver update fixes the flicker temporarily, it might just be the software pushing more voltage through a dying component to keep it stable.
- Heat is the primary enemy of the eDP cable. If your laptop runs hot, the plastic shielding on those tiny wires can degrade, leading to that ‘shimmer’ at low power.
- For business owners, DIY troubleshooting is a liability when data is on the line. This is where effective managed IT solutions for growing companies save the day by spotting hardware failure trends across an entire fleet before they become work-stopping disasters.
- A flickering screen is a high-risk factor for motherboard damage if the internal short is left unaddressed. You can read more about why a cracked laptop screen can eventually damage your motherboard to see how an electrical fault travels.
The Hardware Diagnostic Kit I Use Every Day
#IMAGE_PLACEHOLDER_E#
If you want to move beyond basic software tweaks, you need to look at the tools that actually give you data. I personally never start a repair without checking the S.M.A.R.T. status of the internal drives, because power fluctuations in the screen can sometimes be a symptom of a failing power rail that is also starving your SSD. I highly recommend learning the risk of ignoring that smart status bad warning on your pc before you go deep into screen repairs. For the physical screen itself, I rely on the LCD BIST (Built-in Self-Test) found on most Dell and HP machines—it lets you test the panel without the OS interfering, helping you isolate if the issue is the GPU or the display itself. If you decide the panel is truly toast, make sure you follow a laptop screen replacement step-by-step repair guide to ensure you don’t snap any delicate plastic clips during the process.
Reclaim Your Focus and Save Your Hardware
There is no reason to suffer through eye strain and the constant fear of a hardware crash. By taking these steps—checking your PWM settings, updating drivers from the manufacturer, and knowing when the hardware is physically failing—you are already miles ahead of the average user. Proper tips for troubleshooting laptop screen problems seamlessly aren’t about having all the answers immediately; they are about having a consistent process. Your laptop is your window to your work, your hobbies, and your community. Treat it with the respect its complexity deserves, and it will serve you for years to come. Don’t let a small shimmer turn into a dark screen. Have you ever had a screen flicker that turned out to be something totally unexpected? Let me know in the comments below!